The Hearty Vegetarian

More Than Tofu


Leave a comment

Cheesy Broccoli Soup

Cheesy Broccoli Soup Ever open your fridge and gawk in terror because you have so much broccoli!! I like broccoli but even still… this was unsettling. If you’re like me, then you’ll quickly try and think of 100+ ways to use it up before it goes bad. This soup is your answer! That was the first time I made this soup. More recently I had my wisdom teeth taken out (as well as other oh so fun dental work) and I needed to switch up my liquid diet! I got so tired of tomato soup and apple sauce… and as soon as I had the energy to do some cooking I made this. It’s my new favorite comfort food! This recipe has been modified from this one here: http://the-lowcarb-diet.com/low-carb-broccoli-cheese-soup/ What you need:

  • A nice large chopping knife
  • An abundance of broccoli (or just a craving for an abundance of broccoli)
  • Your tunes to chop to (I went for the classic rock Pandora station this time)

What your soup needs:

  • 1 tbsp butter
  • 1/2 of an onion diced
  • 2-3 medium garlic cloves diced
  • 2 1/2 cups vegetable broth
  • 6 cups chopped broccoli (purchasing tip: one medium stalk will make about 1 1/2 cups chopped)
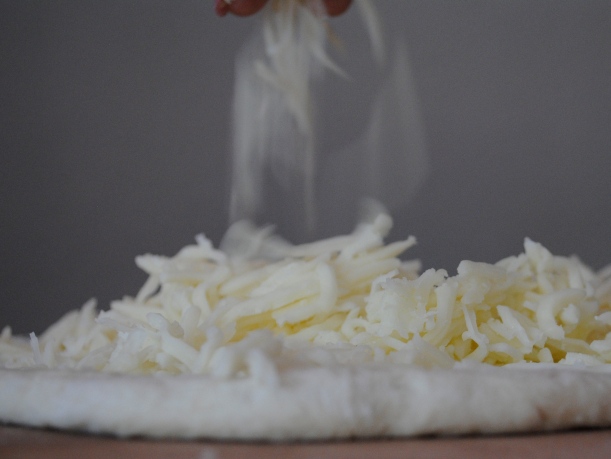
  • 4 1/2 cups shredded cheese (I used 2 cups white cheddar and 2 cups sharp yellow cheddar, I find that sharper cheeses are better but really regular is good too)
  • 1 1/4 cup half & half or heavy cream (or even whole milk is good, I used half heavy cream and half milk for mine)
  • Salt & Pepper to taste

*Suggested toppings: an extra handful of cheese, dollop of sour cream, chopped green onion, veggie bacon bits

First grab a nice large soup pan and add the butter and diced onion on medium heat. Let cook for a few minutes until softened then add in the garlic. Let cook for a minute (waft in all the garlic magic) and then add in the vegetable broth and stir. Cooking the onion Next pour in all of that wonderful broccoli!

Chopping broccoli

So much broccoli!

Stir in broccoli I also like to add in some salt & pepper at this time, sometimes a dash of garlic powder and thyme too. Stir it in and let everything simmer on medium high for about 10-15 minutes. Grab a fork and double check that your broccoli is nice and soft. Now you can add in that cream. Stir it in and let simmer for about 5 minutes. Stir in the cream Stir in all the cheese. Adding in the cheese Give it a taste and see if it needs any more seasonings. Otherwise serve and enjoy! You can add on any of those optional toppings I listed above (I just put some more cheese on top), and serve with bread (I had picked up some delicious soft pretzels that paired nicely!). This would also be amazing in a bread bowl. It’s a thicker soup so when you’re done it may not seem like there’s a whole lot but it’s nice and filling! I make this to serve 2 and have leftovers (because yes, it is even better the next day!). However it would also easily serve 4, probably 6.

Cheesy Broccoli Soup with soft pretzel

Cheesy Broccoli Soup with soft pretzel

Enjoy! the hearty vegetarian


1 Comment

Chile Relleno

Chile Relleno

I first made chile relleno with some awesome friends. We had a lot of fun and made a big mess. The chiles fell apart while cooking, but they were still amazing and fun to make together!
So I thought I would try them again recently and found a few tricks to help make the process a little easier. I already want to make more, they are one of my favorite dishes!

What you need!

  • A side of refried beans and/or rice!
  • Some patience and time
  • A hand mixer on hand
  • I recommend a friend there to help you out and make the process even more fun!

What your chile relleno needs!

  • 6 pasilla chiles (look for wider/larger chiles, they are easier to peel and stuff)
  • 3 *room temperature* eggs
  • About 1/4 cup flour to dust on chiles
  • Salt
  • Oil for frying (Don’t forget to check for this or else like me you have to angrily run out to the store for oil while you leave your kitchen a mess for your roommates to wonder what in earth happened in there)
  • 1 cup of Casero, Oaxaca, Monterey Jack or Mozzarella cheese (Choices! This time around I used Casero)
  • Saran wrap

What your optional chile relleno tomato broth needs!

  • 1 can of diced tomatoes (or 2 diced tomatoes)
  • 3 cups of water
  • 1/2 of a onion diced (perfect if you are also making those refried beans!)
  • 1 vegetable bouillon cube (or 1 cup of vegetable broth)
  • Seasonings: pepper, chili powder, oregano, cumin (you can add cilantro if you happen to enjoy it, I do not)

First set your oven to broil. Rinse your chilies and pat with a towel (or paper towels) to dry. If you have not already don’t forget to pull the eggs out so that they are room temperature when we need them later!

Lay the chilies on a baking sheet and put in oven until they blister and char. Turn occasionally to get an even blister, I’d say check them and turn every 5 minutes or so until done. This usually takes only 10-15 minutes. They’re gonna start to look kind of scary just to warn you! This is to loosen the skin so you can peel them.

Roasted Chile

Pull them out of the oven and put in a heat resistant bowl and cover with saran wrap (I hear putting them in a large ziplock bag works too) and let them sit for 20-30 minutes. This will also aid in loosening the skin of the chiles.

Steaming Chiles

I took this extra time to assemble the tomato broth. You simply add all of the ingredients in a pot and let simmer. I then covered and turned down to low while I did everything else.

Tomato Broth

Now to peel. I laid all my chiles out on a few layers of paper towels and re-used that bowl to collect the chile peels. Just peel off as much of the outer skin as you can.

Next take a knife and make a slit down each chile. Use a spoon to scoop out and discard as many seeds as you can (unless you like them really spicy then I believe you can leave them in).

Seed removal

Slice the cheese into strips and put them into each chile all nice like, try and close them up the best you can.

Casero Cheese

Stuffing Chiles

Take the flour and sprinkle it over each chili!

Floured chiles

This next step is what saved me from having my chiles fall apart on me! Wrap each chile up in saran wrap and place on a baking sheet. Put them in the freezer for about 20-30 minutes.

Wrapping Chiles

I happened to make the mistake of leaving them in there too long (had to go and get that oil I forgot!). If you end up doing that too you will just have to bake your chilies in the oven after they are fried for a bit to make sure the center is cooked through enough.

While those chilies are chilling you can put together the batter!

Take those room temperature eggs and separate the yolks from the whites. Grab your handy hand mixer and whip up the egg whites on medium speed until fluffy. There should be stiff peaks when you pull out the hand mixer. Mix in the egg yolks now and a sprinkle of salt. You should have a nice, fluffy batter!

Batter I put the batter in this large cup so that I could easily dip the chilies in and get a nice, even coat. Very helpful! I’ve seen others use their blender to do this as well.

So much easier than a bowl!

So much easier than a bowl!

Pour out your oil in a pan (I used an iron skillet) and heat on medium high. If you haven’t already, remove your chiles from the freezer and unwrap them.

Once your oil is hot enough start dipping your chiles in batter and then placing them in the oil. I put three in at a time so that I had enough space to turn them. When you see the batter is starting to brown turn them over to brown on the other side as well.

Frying the chiles

Then remove, place on a few paper towels to get rid of any excess oil, and repeat until done!

If you made the tomato broth, ladle that onto your finished chile rellenos and enjoy! Serve with some refried beans and maybe some rice too, yum!
Chile Relleno

the hearty vegetarian


2 Comments

Refried Beans

refried beans

Refried beans & chile relleno!

What you need:

  • Delicious food that requires a side of refried beans (i.e chile relleno, enchiladas, rice etc.)
  • A good arm (needing to get some aggression out helps too)
  • A potato masher (or a fork and a really good arm will work too)

What your beans need:

  • 2 cans of black beans
  • 1/2 of an onion diced
  • 1 tbsp oil (I use vegetable oil)
  • 1/2 cup or so of cheese (I use cheddar)
  • Seasonings (I start with a 1/4 tsp salt, garlic powder, chili powder, cumin)

I love Mexican food. And so when I found out that making your own refried beans was this simple I was in creamy bean heaven! I usually make this recipe for two and we usually have some leftovers (which I prefer!). We could probably get by on just using one can of beans but then I would be devastated to find there was none left for the next day. You could easily adjust this for as many cans of beans you would like!

Making the grid.

Making the grid.

I start with dicing that onion! I was shown a really helpful onion cutting technique that is great for quickly dicing an onion. I personally hate hate hate cutting onions and cry over it quite often! After getting that pesky outer layer off you just cut into your onion like a grid and only go about half-way through it.

Onion

Then turn it on its side and just slice and you’ll get nice, perfect diced onion!

Saute onions

Start with a nice wide, flat pan and heat your oil on medium low. Add the diced onion and sauté until softened.

Open up your can of beans and drain one can but leave the other with liquid. Pour both into the pan with the onions.

Beans

Stir in those seasonings now. Turn heat up to medium. I usually cover them and let them cook until they start to simmer. Once they have softened up start mashing! Careful not to splatter the beans while you do this (I tend to make a mess here oop!). Mash them the best you can, until you stop seeing so many whole beans.

_DSC1829

refried beans

About now I taste and add more seasonings if needed. Add in the cheese and mash it in as well. And you’re done! I usually sprinkle extra cheese as a garnish when I serve, cuz it looks good and well more cheese!

_DSC1835
Way better than canned refried beans! Eat and repeat next time you need a great side dish!
the hearty vegetarian


2 Comments

White Pizza

A few years ago my boyfriend took me to this amazing Italian restaurant (Emperor Norton’s) and insisted that I try their white pizza. Being a lover of all things cheesy, I took his advice. Wow! It’s like cheese pizza. But on crack. Seriously, if you have not tried a white pizza you are missing out!

Therefore I became slightly obsessed and had to make my own. Here is my version of the white pizza.

What you need:

  • a glass of good wine
  • clothes you can get flour on
  • your jam (I personally love baking to the golden oldies channel on Pandora, today I went with Disney songs however to mix things up)
Wine is a must when baking

vino!

What your pizza needs:

  • pizza dough (either homemade or store bought, Trader Joe’s makes an excellent one)
  • olive oil (just enough to brush on your pizza)
  • garlic (2 cloves or so depending on how garlicky you are feeling)
  • basil (again depends on preference, I used about 10 small leaves diced up)
  • salt & pepper
  • ricotta cheese (about 1/2 cup)
  • mozzarella cheese (about 1 cup)
  • parmesan cheese (a tablespoon or two to sprinkle on)
  • goat cheese (1/4 cup or so, and I have left this cheese out in the past, but it’s an amazing flavor so if you can-use it!)
  • provolone cheese (1/4 cup or so. though I admittedly forgot to pick this cheese up today)

Preheat your oven to 450 degrees.

Basil <3

why yes, I do plan to put as many hearts on this blog as I can!

Take the ricotta, diced garlic, diced basil (about half of it), salt and pepper and mix in a small bowl. Sometimes I add a bit of oregano or thyme as well. Also I usually take a small taste to make sure I like where the flavors are going. The first time I made this I didn’t mix in stuff with the ricotta and it wasn’t nearly as flavorful. Set this good stuff aside for now.

White Pizza

mmm goodness!

Once your dough is raised and good to go roll it on out. Sometimes I make my own dough, today I went with Trader Joe’s which is always good. I used half of the dough given to make a pizza to serve 2. Once your dough is rolled out all pretty like, move it on over to your pizza stone (or a greased baking sheet works too! that’s what I used up until I received this lovely stone).

White Pizza

Lightly spread olive oil over your pizza dough. Next, take that tasty ricotta mixture and spread over the dough (not too thick, I’ve used too much before and found it overwhelming). If you have extra leftover you can save for a few days to use later.

White Pizza

Next, spread on all those cheeses! I Put the mozzarella first, then parmesan, then goat cheese (again provolone is also a great addition here).

White Pizza

mmm cheese!

Sprinkle on the rest of the diced basil last.

White Pizza

almost done!

Put this baby in the oven!

Baking time usually varies on a few things such as your oven or the thickness of your dough. I usually check it after 10 minutes and then determine how much longer it needs.

White Pizza

do check for a crust that is done in the center and browned, bubbly cheese

15 minutes worked out perfectly!

White Pizza

voila!

Hope you enjoy this cheesy pie! It’s even better leftover the next day, if you can save any…. 😉 The Hearty Vegetarian